Composing Outdoor Photography
Whether you are a beginner or experienced photographer, these are six things you can consider while shooting outdoor and adventure photography to create a more intentional and compelling composition.
Subject and Framing
When thinking about framing, keep it simple. You want to be able to efficiently communicate the subject of your photo. It’s okay to make your viewer think about what the photo means, but as a photographer you control what your viewer looks at. Eliminate distractions and don’t overcomplicate the photo.
Keep subjects open and free and have lines work with the subject, rather than against. Leading lines are lines that lead the viewer’s eye to the subject. Lines that intersect the subject arbitrarily can be distracting. Example, if you are shooting a subject in a wooded area, it’s more appealing to have an open space behind the subject, rather than having trees or lines cut off the subject.
Anything that points, creates a sense of direction. You can use that to your advantage.
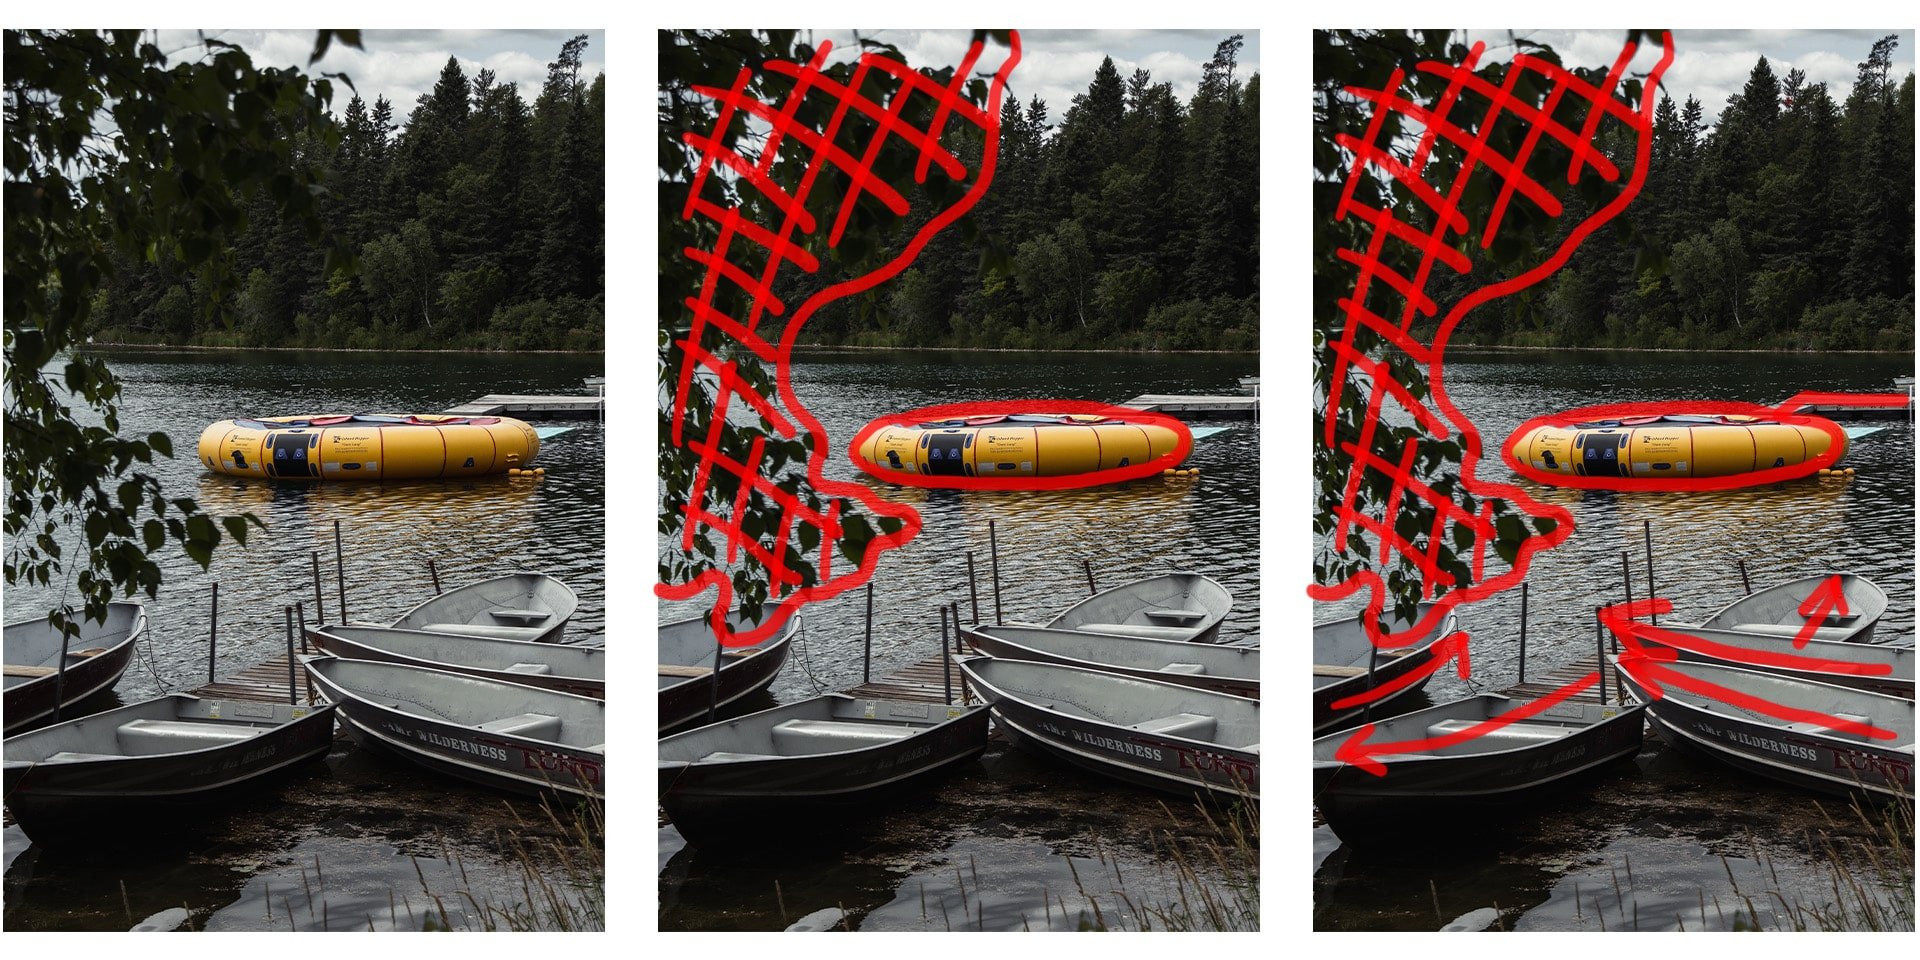
The trampoline is framed around the leaves, with the boats adding to the foreground.
Open Space Around the Subject
In this photo, the model is lined up with the opening in the trees.
Ground to Sky Ratio
How much of your image should be sky? How much should be landscape?
Placing the horizon low in the photo opens up the sky. If the sky is the subject, this can work. Filling the frame with negative space can create a feeling of vastness, openness, or emptiness.
Placing the horizon high in the photo brings the attention the landscape first and foremost. This can make a landscape appear larger, monumental, grand, or awe inspiring. It can also create a sense of the viewer feeling small in comparison to the scene.
High Horizon
Keeping the horizon high in the frame can emphasis smaller elements in the foreground.
Low Horizon
Keeping the horizon lower in the frame can emphasis how small the subject really is.
The Triangle in the Corner
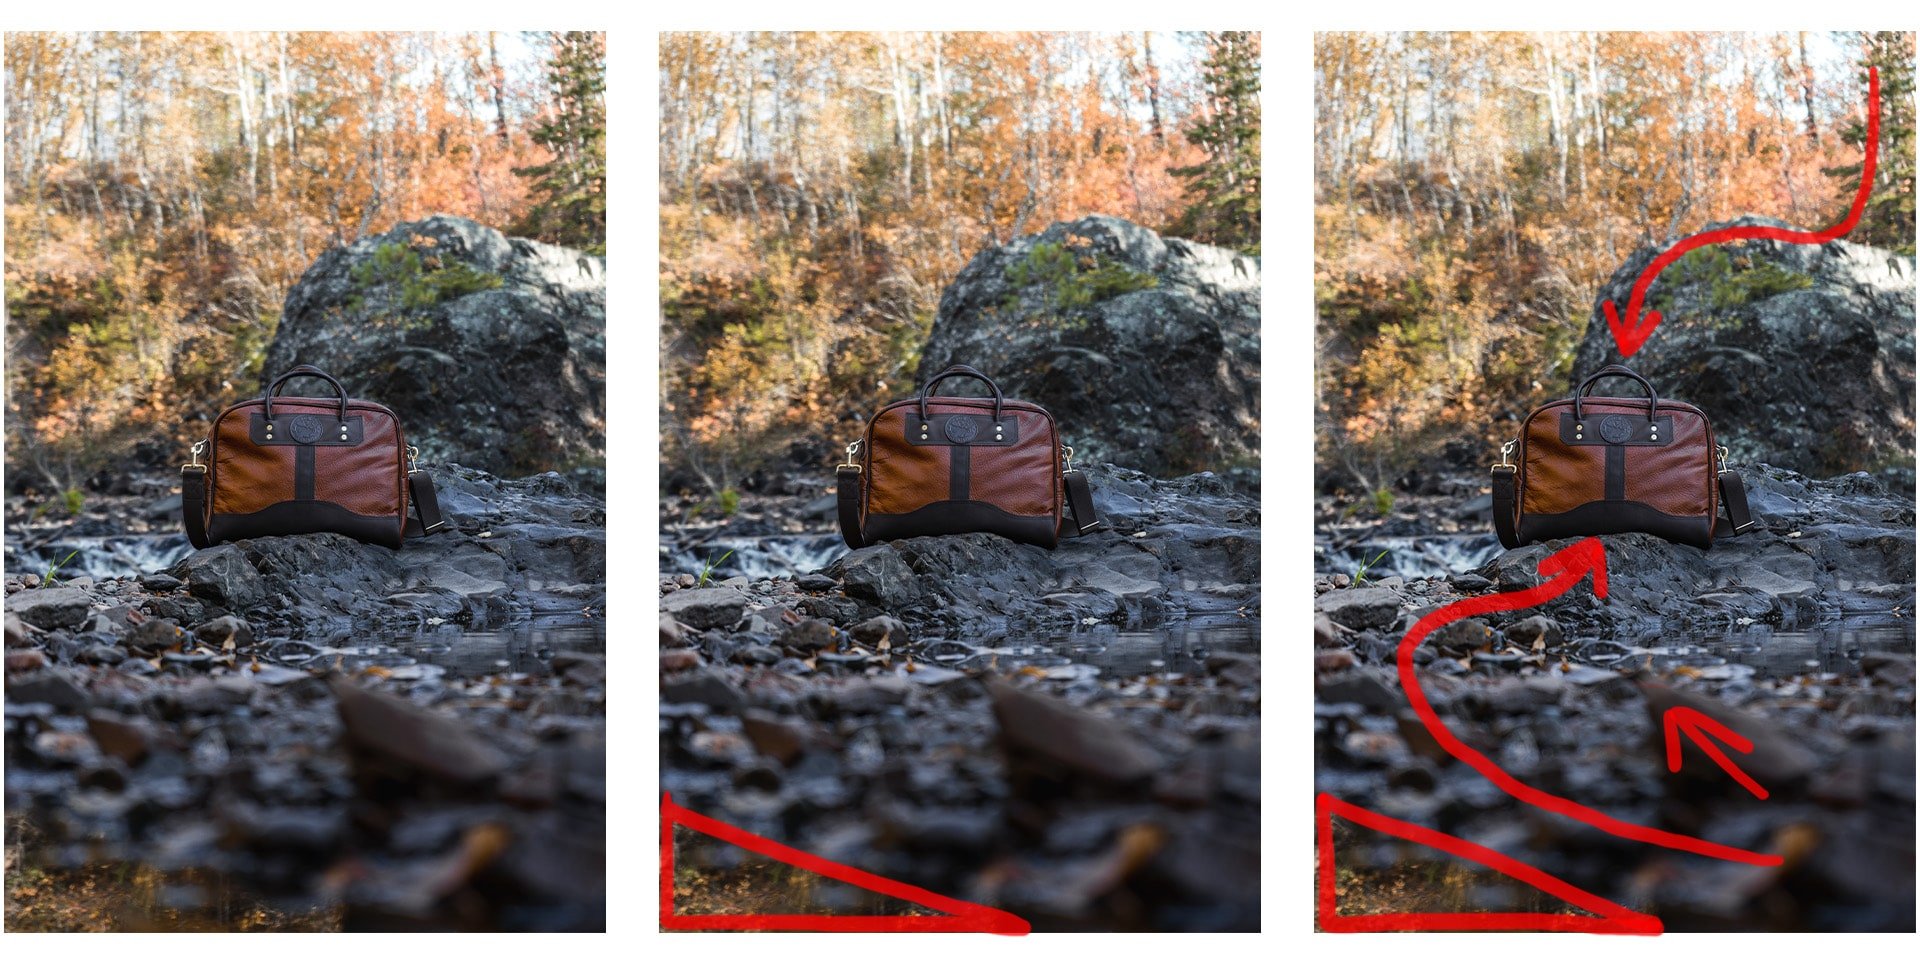
You could just call this one “Use of Foreground” but the best way I can describe how I use foreground time and again is “the triangle in the corner.” It’s a foreground element in the corner that sets a certain perspective, or anchor, for the scene.
Typical elements to utilize in outdoor scenes could be either rocks or foliage, but it could be anything you can place between you and the subject to give more depth and perspective to the photo.
This can be done to induce the feeling of peaking around a corner, looking over someone’s shoulder, or peering through something. It gives the viewer a more immersive feeling into the scene. If you choose to center your subject, the foreground is a great way to make the photo asymmetrical. Foreground in the corner can also set a sort of weight where the scene feels very grounded.
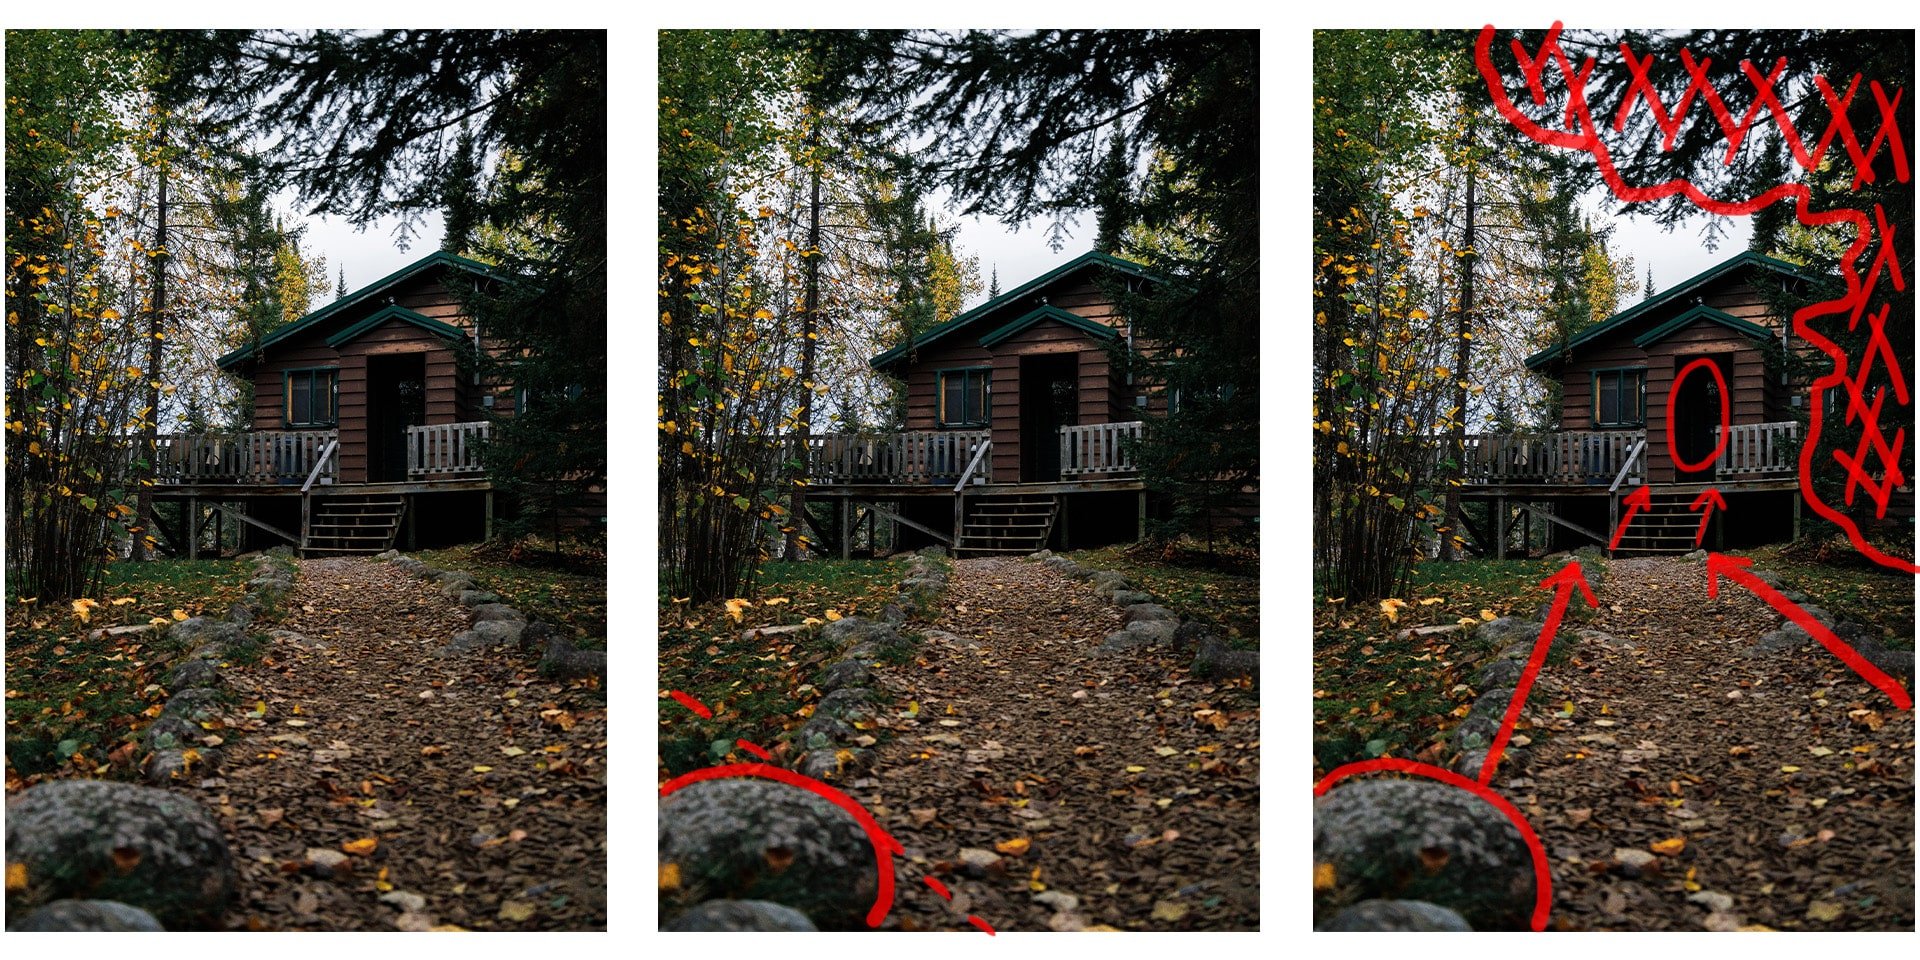
The rock acts as an anchor, the trail takes you to the cabin which is framed within the foliage.
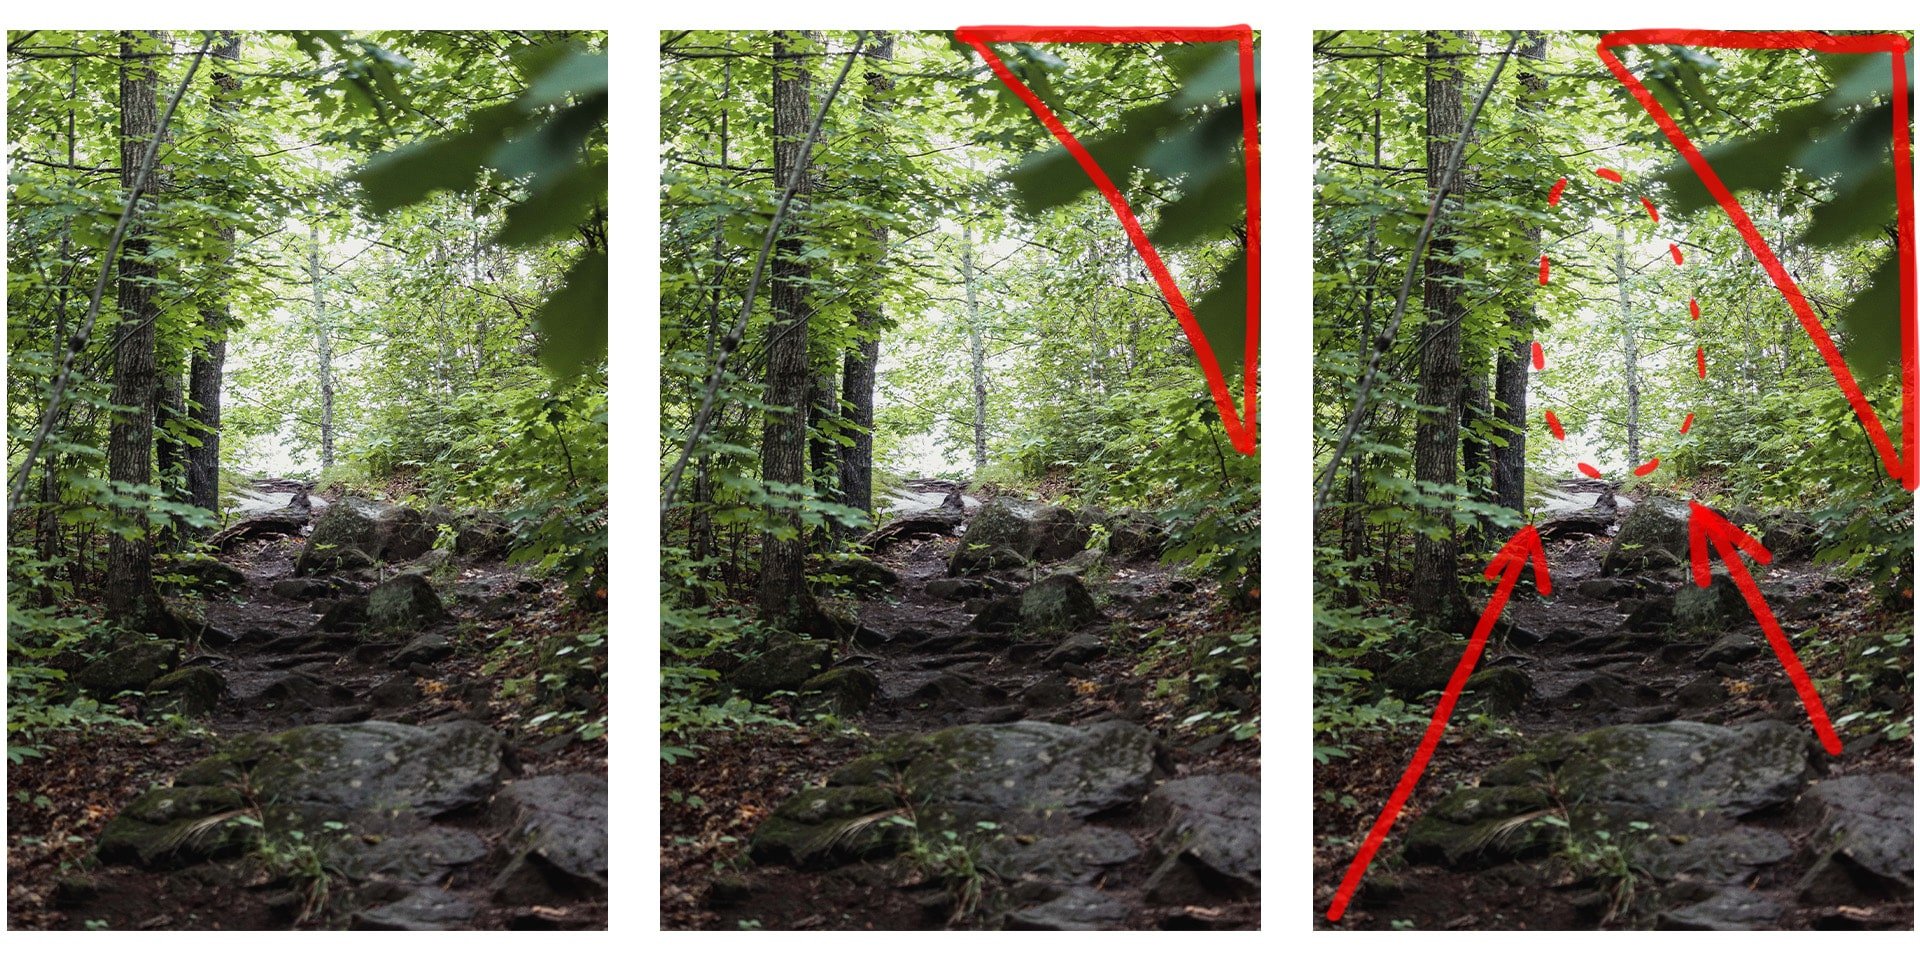
The leaves give a sense of immersion with the trail leading you to the light.
Hinting at More
With just the hat peaking out of the corner, the image hints at larger picture.
The Sun Flare
I use this all the time. Placing the sun on the edge of a subject or landscape to just give it a little bit of an extra something. It makes the photo feel more intentional. It’s easy to overdo the sun flare though, if it’s too much, it can be overpowering.
When I shoot photos like this, I’ll usually take one where the subject blocks the sun completely, a few with the sun flare just peaking out, and then one where the sun is in full view. If you want an entirely backlit subject, sometimes the sun flare just doesn’t work. The most important thing to the sun flare, is finding a happy medium that fits the scene.
Be Intentional
If it is there, use it. Placing the flare at the tip top of the roof makes this photo feel more intentional.
Waterfalls Lined Up With Subject
Lining up a subject underneath or in front of a waterfall is a great way to use the natural features of the landscape. Waterfalls tend to be lighter, contrasting subjects and leading attention downward. Models looking up at a landscape, tend to also inspire a sense of awe and adventure.
Pouring Down on the Subject
The waterfall and subject work together to bring the attention to the subject.
Level With Subject
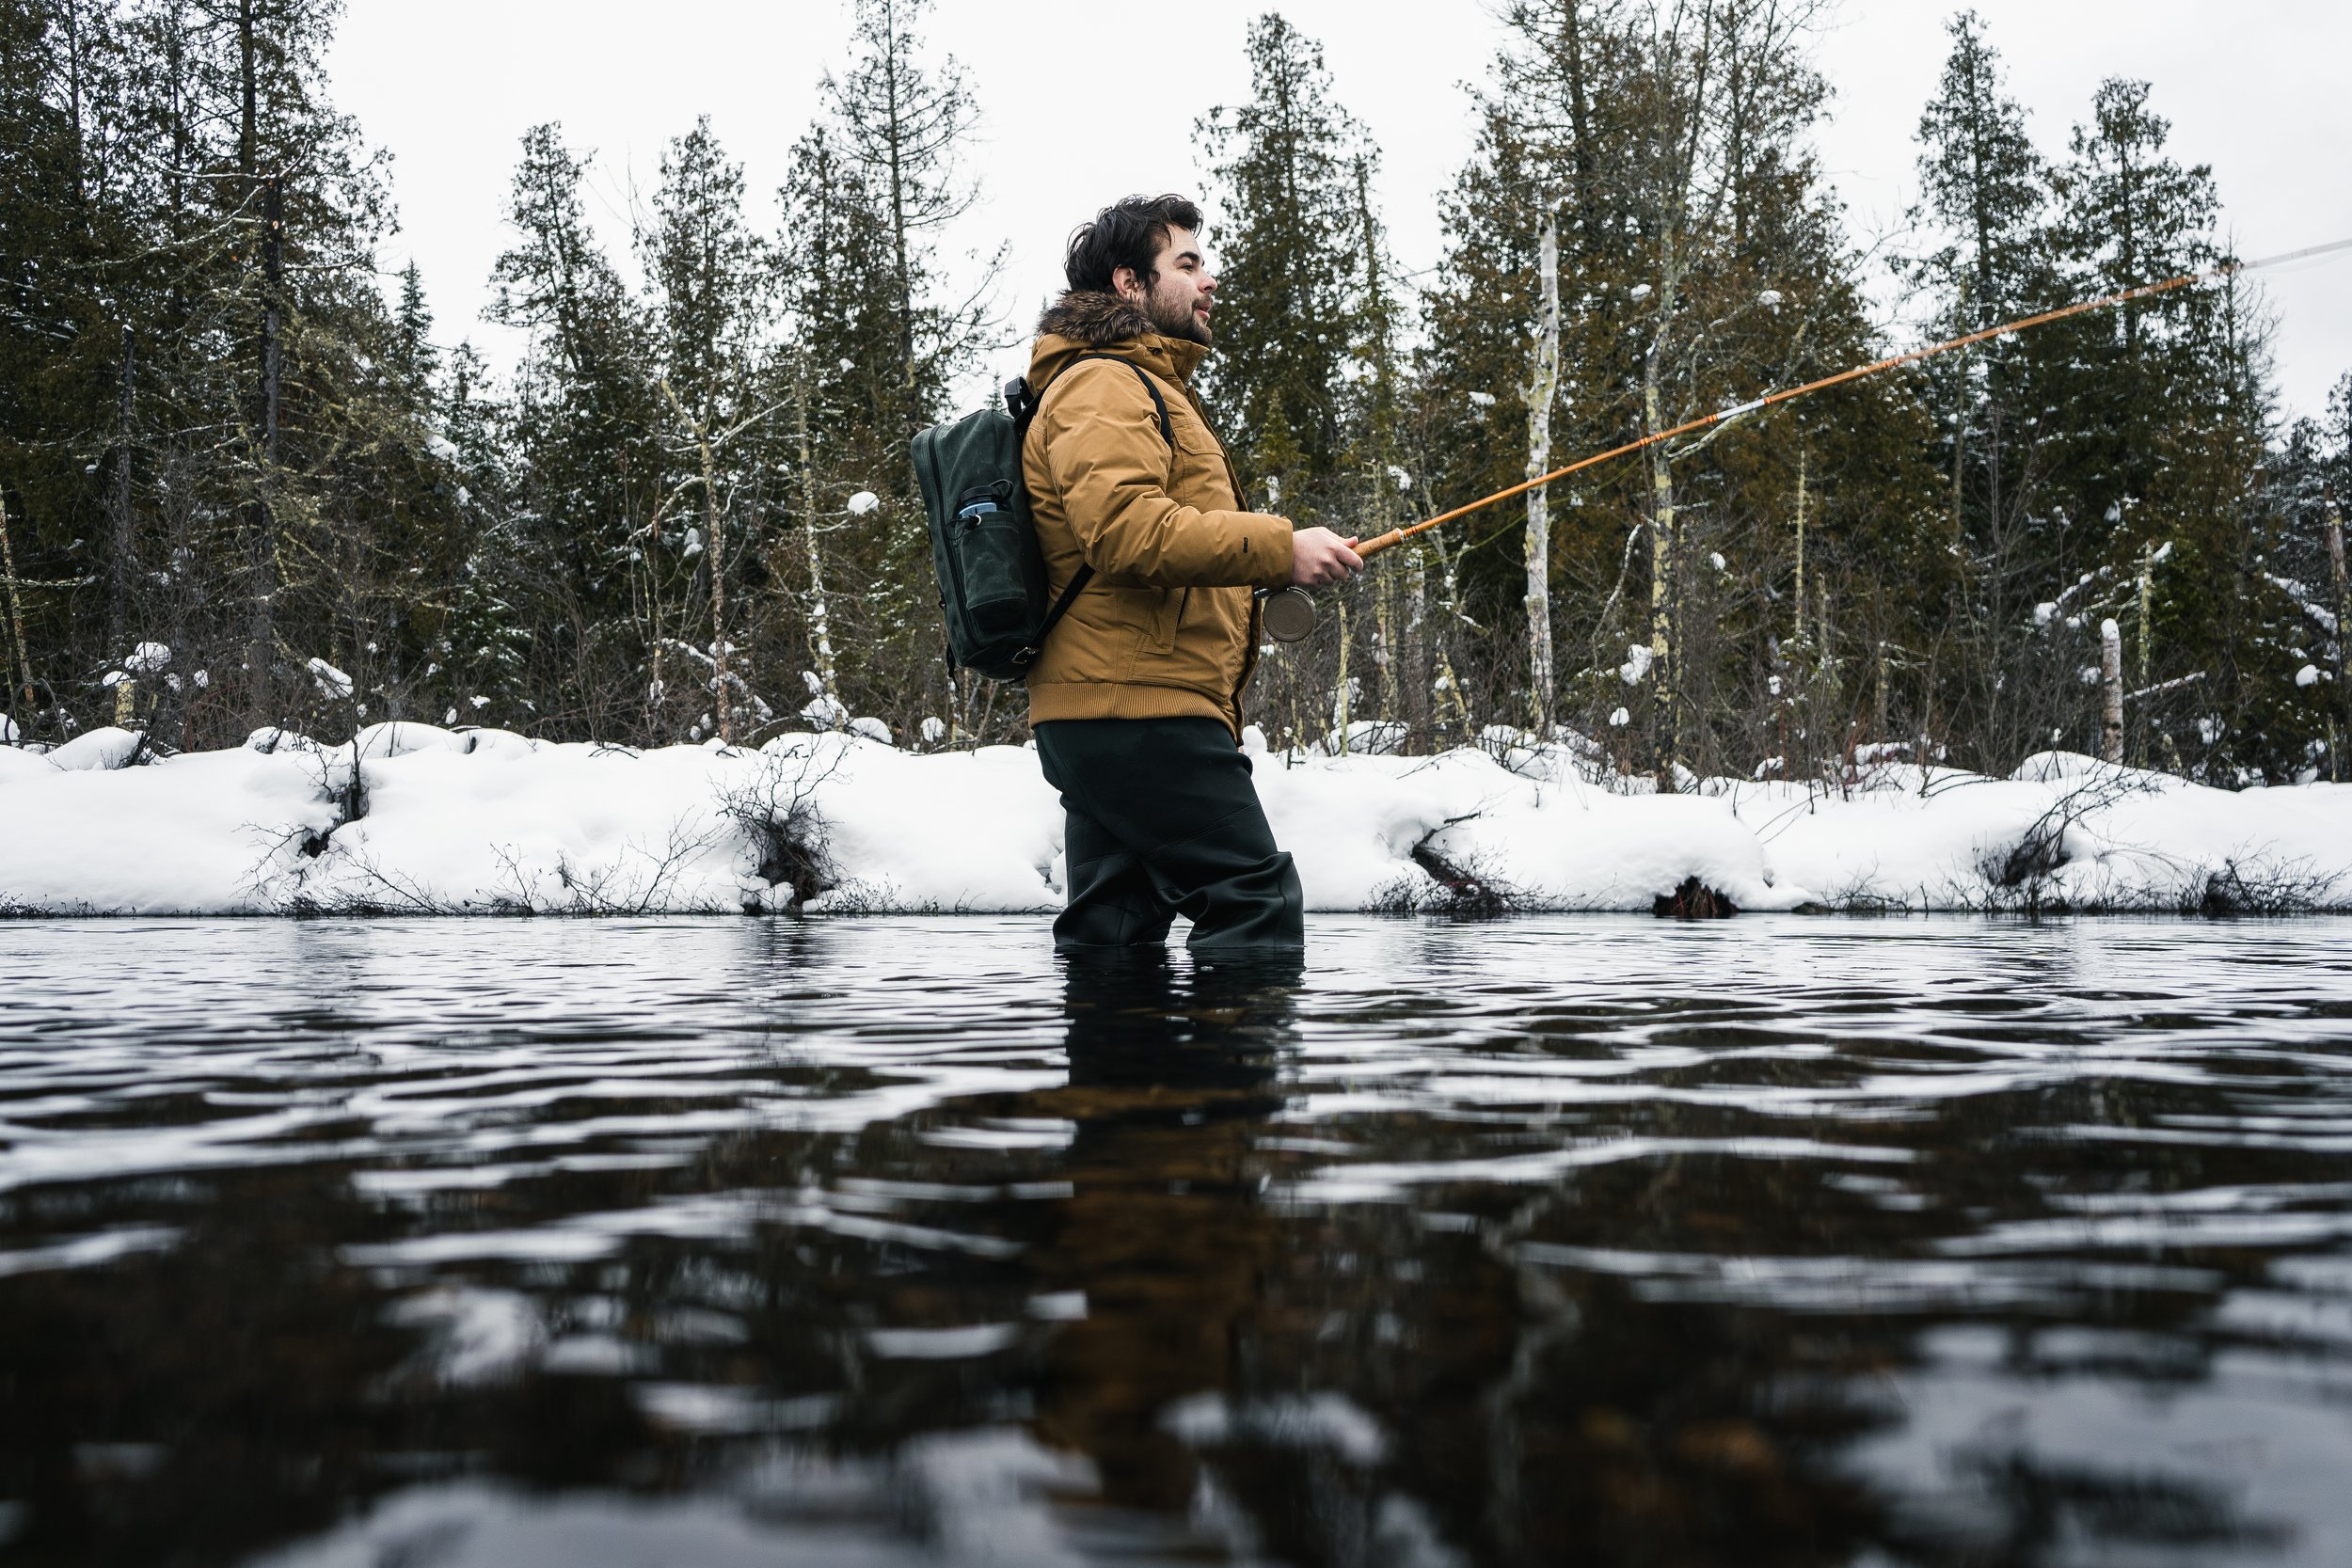
Being level with the subject brings the viewer to an equal perspective. It also makes the framing feel more intentional. Shooting something low to the ground, get low to the ground. Bring the viewer to the world of the subject.
Doing this can also bring more interesting foreground into the scene, having the ground in frame but out of focus to show where exactly the viewer is looking from. Being level with a subject can also bring a sort of larger-than-life feeling. If something typically small, is now seen as huge, it feels more important.
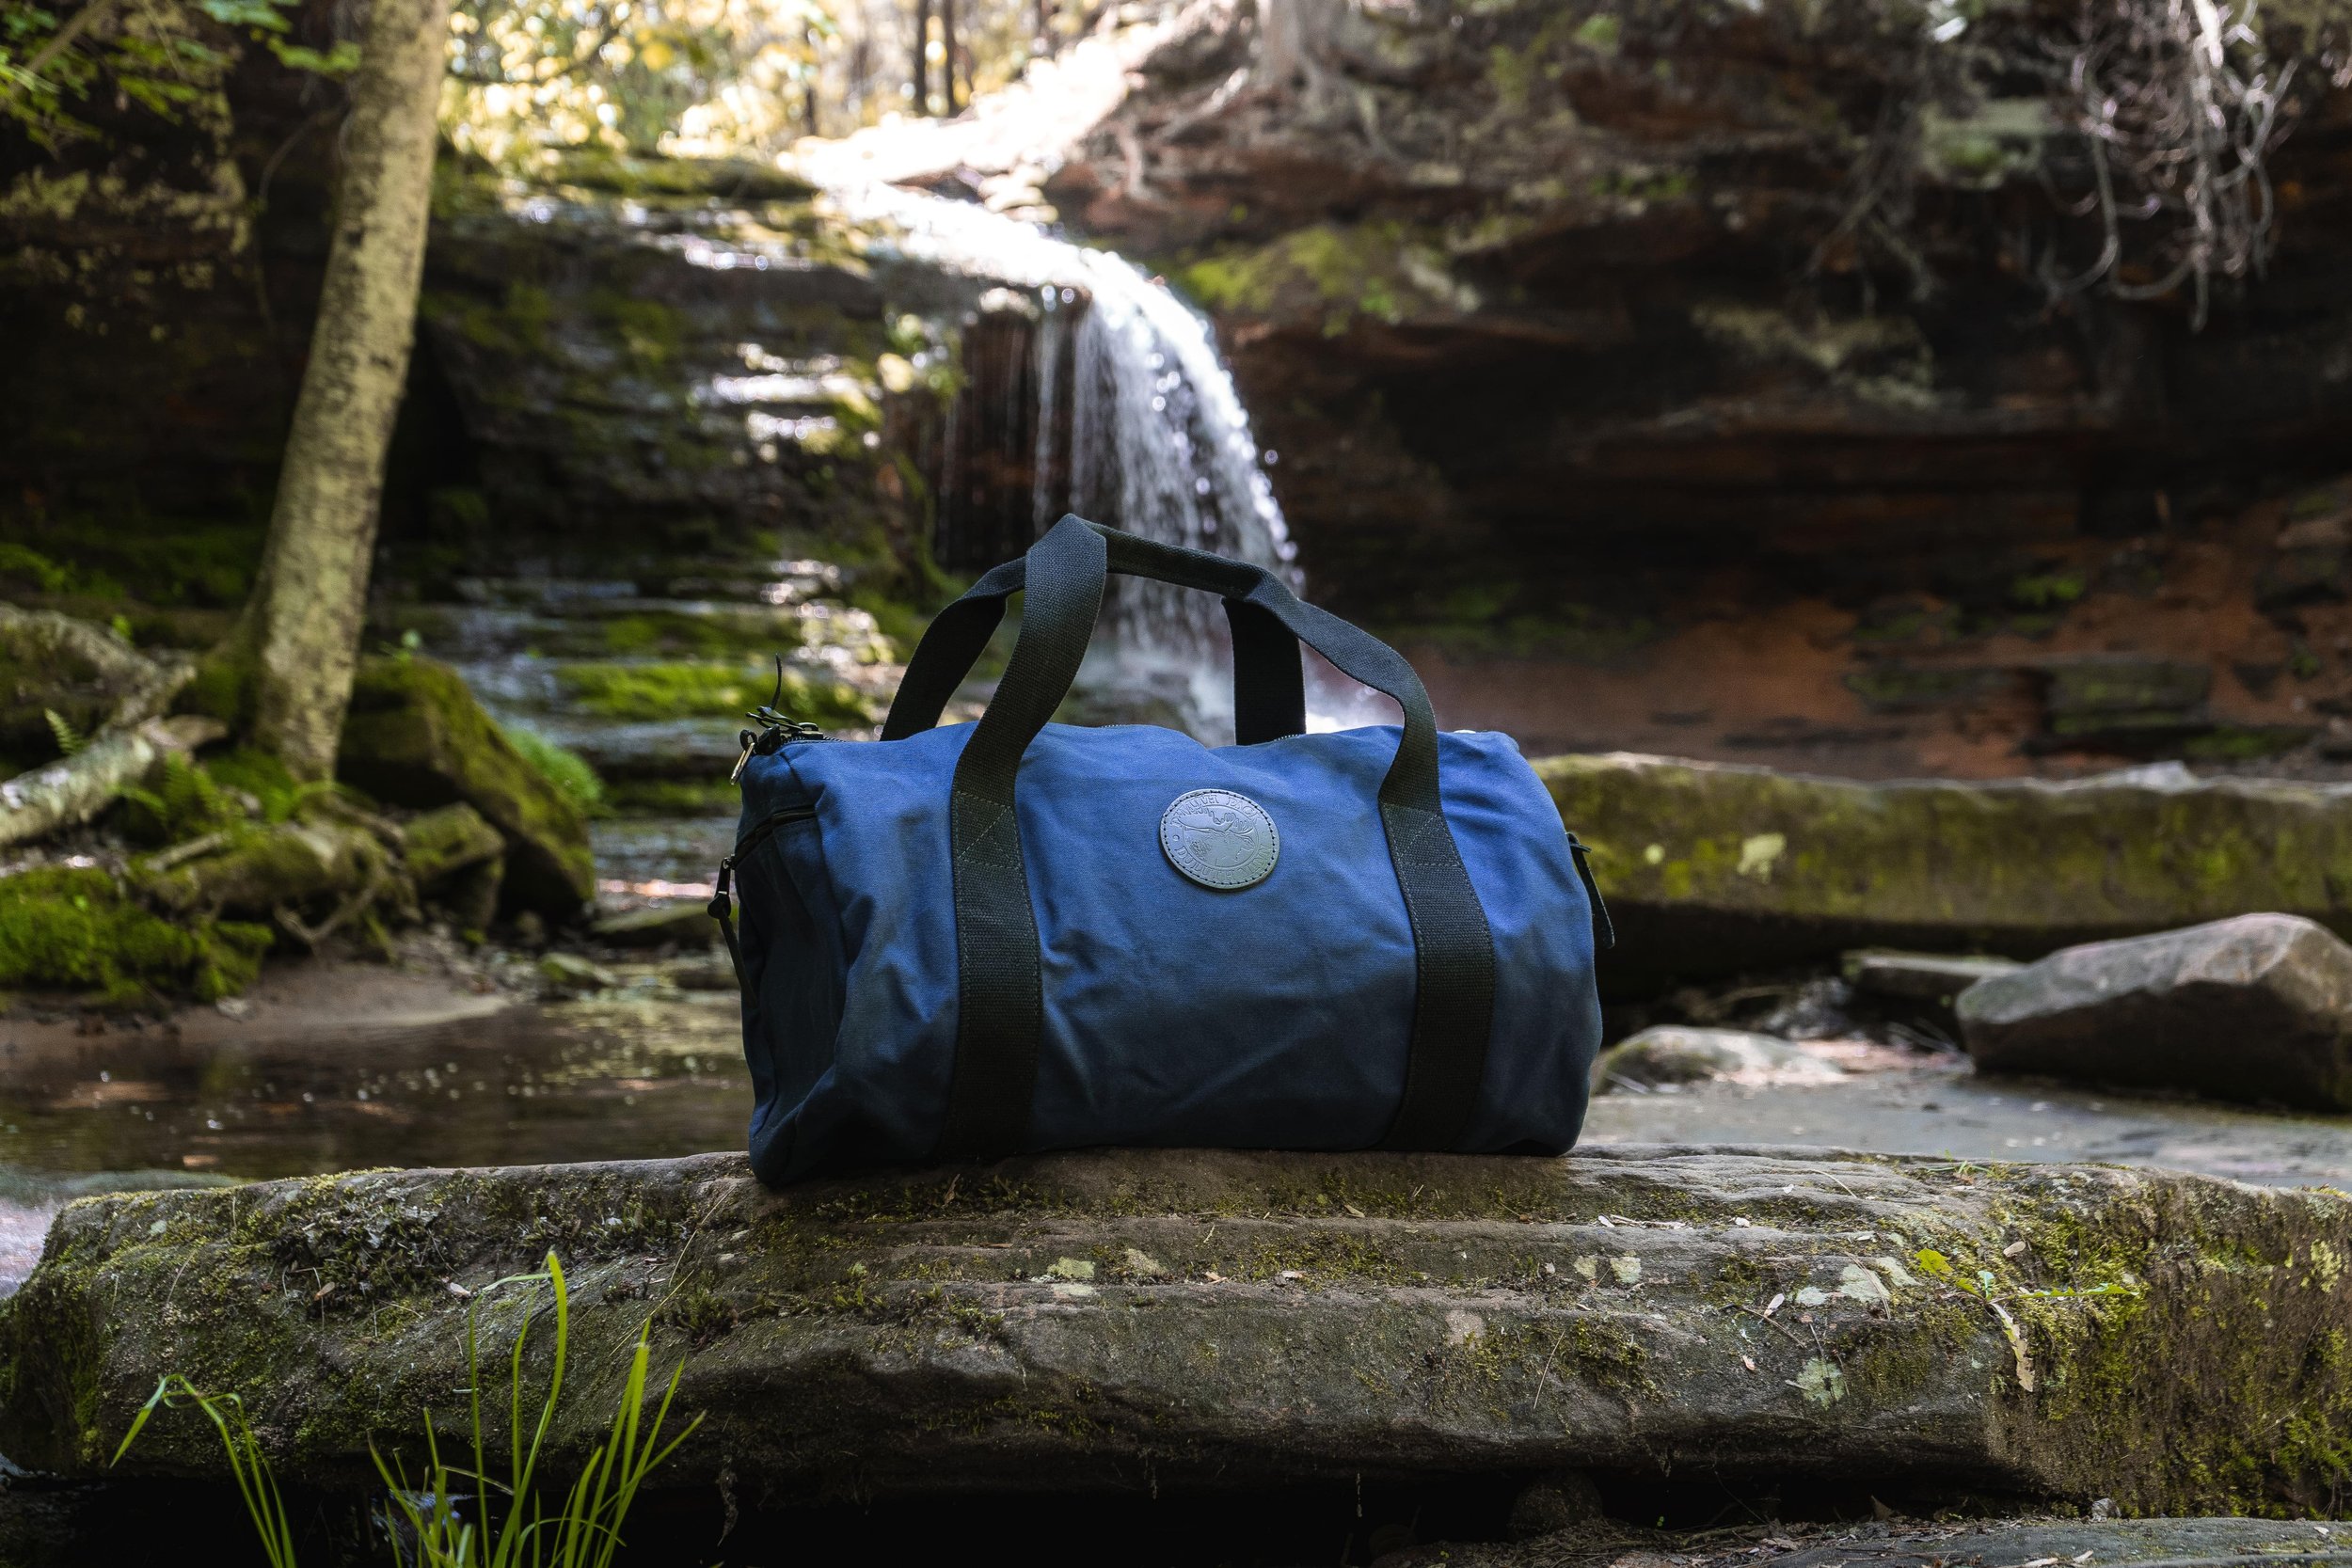
The arrangement of the foreground and background brings all the attention to the subject.
Get Low
Bring your viewer to the world of your subject.
Add Texture
Being low to the water not only provides a more immersive point of view, the ripples of the water add texture to the image.
Closing Thoughts
These are just a few things you can consider while shooting in the outdoors to create a more interesting and intentional image. At the end of the day, you are the photographer. Trust your eye! It’s about what you see and what you want to capture.
See ya down the trail!
